Squares
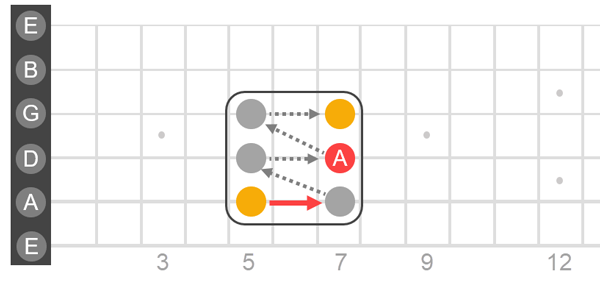
Practice this first exercise starting on the 5th fret of the A string. Play in both directions. Use your first and third fingers to play the notes. If that's difficult, try using only your first finger to play all the notes. (My 10-year-old grandson found that helpful in his first lesson.)
(Notation: A5-7, D5-7, G5-7, reverse and play G7-5, D7-5, A7-5)
The A minor pentatonic scale has only five notes. You can play those five notes in many places on the guitar neck. Below, I've added another square starting on the 10th fret of the low E string. Play both squares and compare the sounds of the notes.
Notation: (First square: A5-7, D5-7, G5-7)
(Second square: E10-12, A10-12, D10-12)
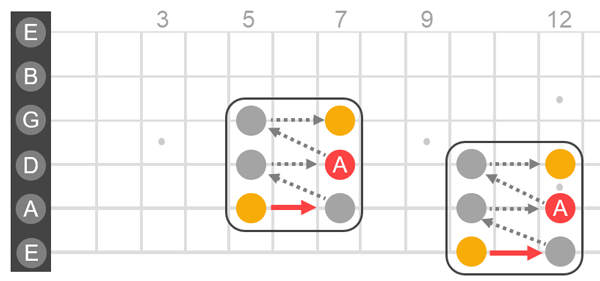
Even though the corresponding notes are the same frequency, they do not sound exactly the same. The A notes, for example, will sound different because the string widths give the notes unique overtones. Later when you create your own licks and chord progressions, you can use this concept to add variety to your playing.
Best Time to Practice
A scientifically proven best time to practice a new motor skill is right before bedtime. Your brain won't remember the split pea soup you ate for lunch, but it will remember these finger gymnastics. When you wake up in the morning, you'll be surprised how much practicing your brain did while you were asleep.
Squares always overlap each other's orange corner notes. Sometimes one or two rows of a square are off the fretboard. Try playing this next sequence starting on the 5th fret of the low E string.
(Notation: E5, A3-5-7, D5-7, G5-7)
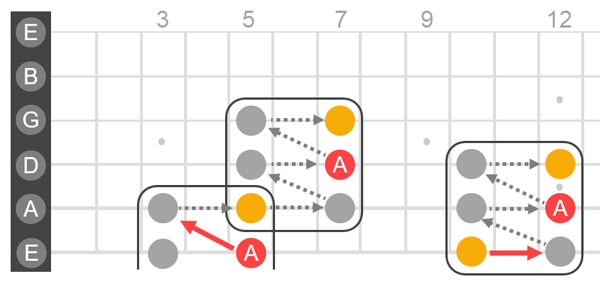
More about overlapping squares in the next section.
Finger Pressure
Go easy on your fingers. Position your finger behind the fret. Place your finger on the string but don't press down. Now strum that string. The sound is muted. The string can't vibrate because your finger is applying enough pressure to stop the vibrations. Strum and gradually add more pressure. Stop adding pressure when you hear a note. That's the right amount of pressure.