A World Without Squares
To understand fretboard navigation it helps if you can look at it from multiple perspectives. So far we've studied it from the perspective of squares, rectangles and root notes. Each one of these bring up images in your mind. Next we're going to look at the perspective of orange notes.
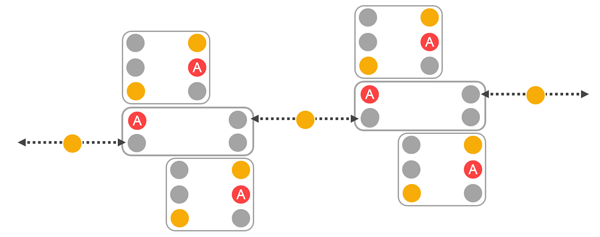
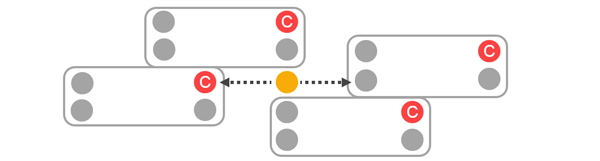
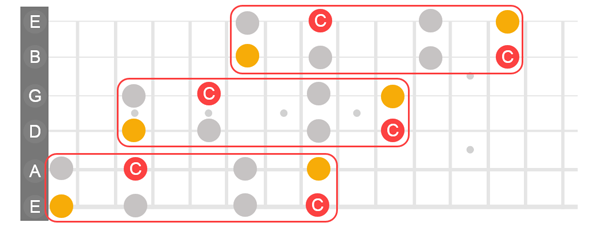
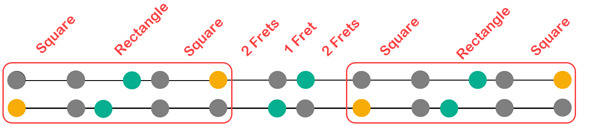
If squares were extinct, could we survive with only rectangles? Let's find out. Here we have two stepping squares with overlapping rectangles.

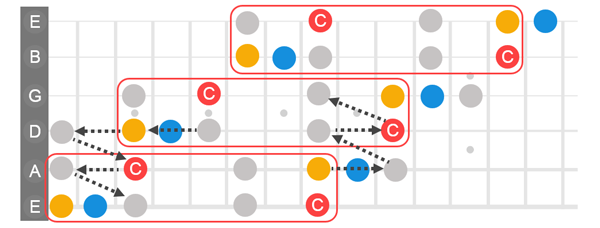
If we remove the stepping square outlines we're left with the orange note. This tells you that anytime you land on an orange note, in a minor pentatonic key, you're just a narrow interval away from rectangles and you're not far away from root notes.

The major pentatonic version of this is similar. The root note is one narrow interval to the left of the orange note.

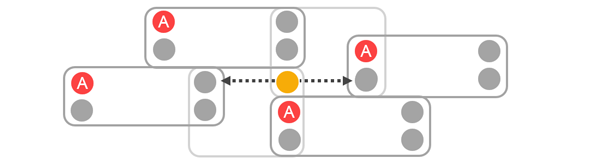
Realize that this perspective repeats itself.

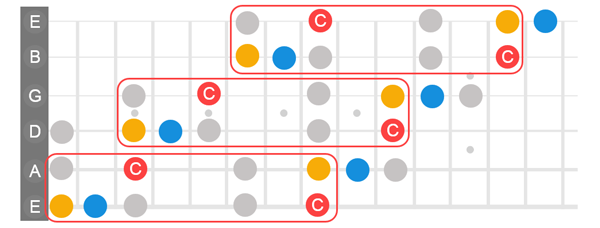
Of course, you can add stacking Freedom Blocks.
Or, play notes in stepping squares before moving on to the next rectangle.
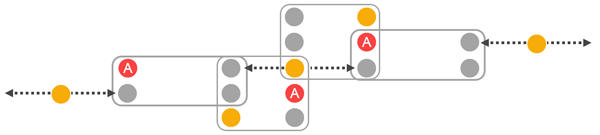
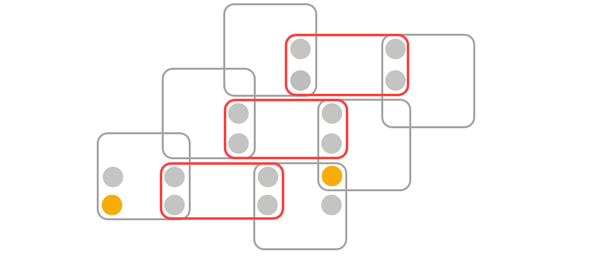
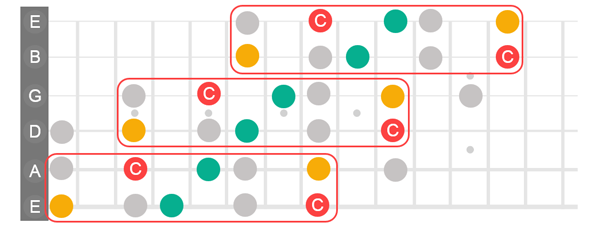
If we go back to the first illustration and add two more overlapping rectangles, we get the following.
Once again we'll remove the stepping square outlines and leave the orange note. Imagine yourself on the orange note below. Of course, that's the junction of two overlapping squares, but ignore that and consider how you could move around in this perspective.
Start anywhere on the fretboard and assume the note you're on is an orange note in a minor key. The note below it is the root note. Turn on a backing track in that key and start moving around, without loosing site of that orange note.
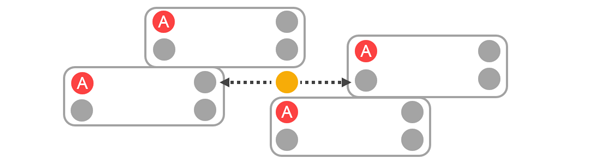
Here is the same illustration in a major pentatonic key. Find the orange note anywhere on your guitar, from that position figure out your major pentatonic root note and start a backing track in that key.
Fortunately squares will never go extinct as long as we don't disturb their eggs.

Stepping Rectangles
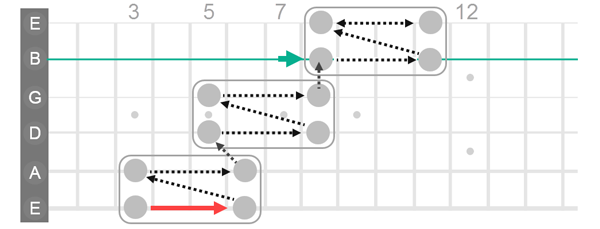
Stepping rectangles are similar to stepping-squares except rectangles don't overlap each other. The first rectangle below starts on the 3rd fret of the low E string. Try this sequence in both directions. Notice how the third rectangle, on the B and E strings is shifted up one fret.
(Notation: E3-6, A3-6, D5-8, G5-8, B string shift, B8-11, E8-11)
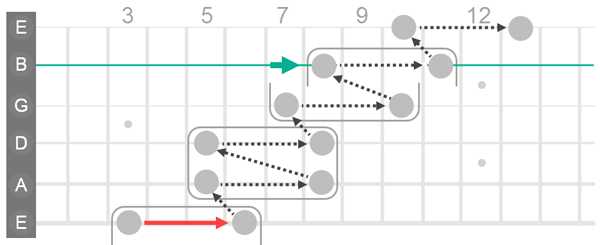
In the previous examples, the entire rectangle landed on the B and E string, so the entire rectangle shifted up one fret. In this next example, only the top of the rectangle lands on the B string.
(Notation: E3-6, A5-8, D5-8, G7-10, B string shift, B8-11, E10-13)
Stepping rectangles and squares are intertwined with each other.
We can extract this easy to remember pattern.

And, like mad scientists, we can create super-stepper. Start on the 1st fret of the low E string and see what you can create using a C minor backing track.
You can add pizzazz with blues notes next to every orange note.
Whenever you see a blues note, you're on row one of a square. You can switch between stepping rectangles and stepping squares.
When we get to the diatonic scales we'll add back the two notes that we removed from the minor scale to get the minor pentatonic scale. As you can see below, it's not difficult to add those notes in while soloing, giving you more scale tone variations.
Solo on Two Strings
Here's the "super-stepper" shape from the previous section. Try playing this pattern of notes on your high B and E strings. You can start anywhere.
You can add a blues note that's always on the right side of every orange note.

Or switch into the the diatonic (7 note) major and minor scales by adding two notes left out of the pentatonic scales.

Try soloing with these two strings using a C major backing track. You can start on a root C at the 8th fret of the high E string. Play both directions.
(Notation: B1, B3+E3, B5+E5, B8+E8, B10+E10, E12, B13, B15+E15,
B17+E17, B20+E20, B22+E22)

Now try the soloing with an Am backing track. Except for the root position it's exactly the same as C major. That's because A minor is the relative minor of C. You can start on the 5th fret of the high E string.
(Notation: B1, B3+E3, B5+E5, B8+E8, B10+E10, E12, B13, B15+E15,
B17+E17, B20+E20, B22+E22)

You can switch into the major or minor diatonic scales by adding in the two notes removed to create the pentatonic scales. These notes are different for major and minor scales, but their positions in the two-string pattern are the same. Here is an A minor version. (The extra notes are in bold in the notation.)
(Notation: B1, B3+E3, B5+E5, B6, E7,B8+E8, B10+E10, B12, E12,
B13, E13, B15+E15,
B17+E17, B18, E19, B20+E20, B22+E22)

Here is a C major version. The pattern is the same as the A minor pattern and the extra notes are in the same position. All that changes is the note used as the root of your scale. The notation is identical, but I'll repeat it here.
(Notation: B1, B3+E3, B5+E5, B6, E7,B8+E8, B10+E10, B12, E12,
B13, E13, B15+E15,
B17+E17, B18, E19, B20+E20, B22+E22)

Notice the following pattern of intervals which makes this easy to remember.
This two string pattern works on any two adjacent strings except G and B.
"Music is the medicine of the breaking heart."— Leigh Hunt